
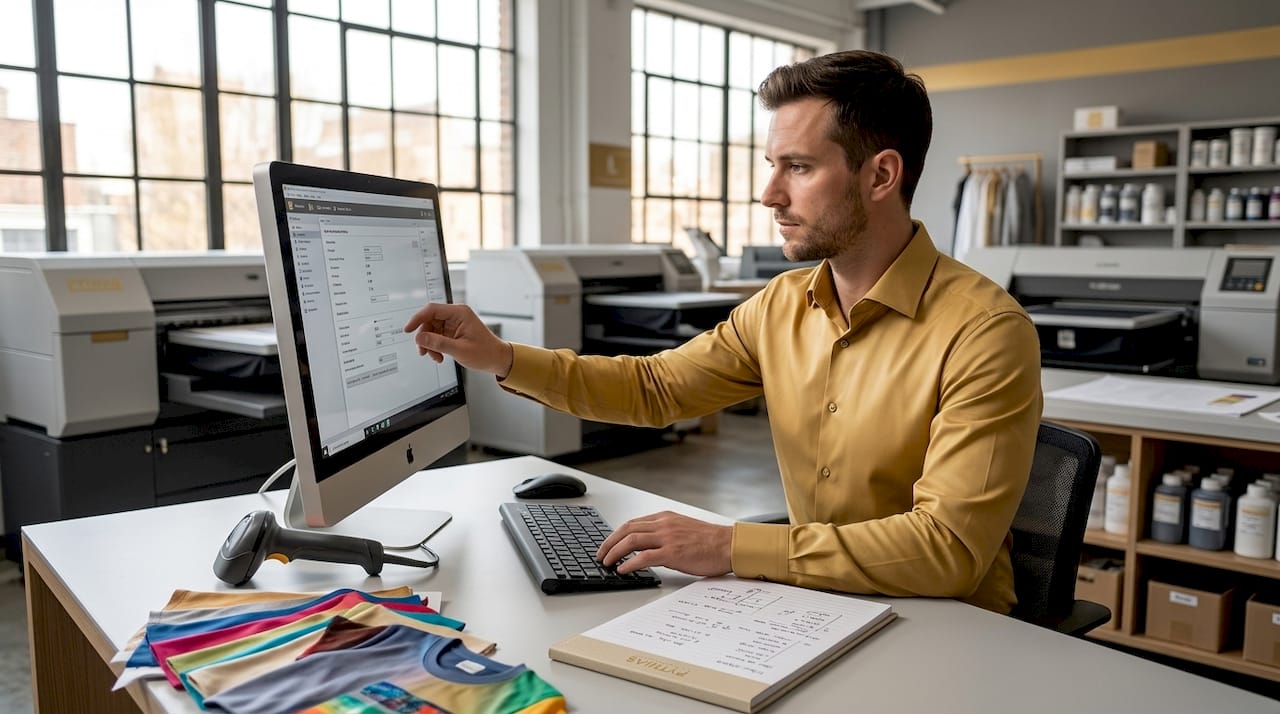
Garment print shop software setup is the process of installing, configuring, and integrating specialized printing and inventory management software that controls your print production accurately and repeatably. This guide covers RIP (Raster Image Processor) software installation, color and white ink configuration, inventory management system setup, and integration best practices for DTF and DTG operations. Whether you run a single-machine shop or a multi-location print-on-demand business, getting your printing shop management software configured correctly from day one prevents costly rework and production delays. Pythiastechnologies built its platform specifically around these workflows, so the guidance here reflects real operational needs.
What does garment print shop software setup actually involve?
Garment print shop software setup covers two distinct but connected layers. The first is your RIP software, which acts as the production brain controlling ink channels, color profiles, and print speed. The second is your garment printing management system, which handles inventory variants, order tracking, and fulfillment. Both layers must be configured correctly before you process a single production job.
Most print shops underestimate how much the RIP layer affects output quality. RIP software controls white ink layers, ink density, color profiles, and print speed in DTF and DTG workflows. Without it, professional print results are not achievable. That single fact explains why shops that skip proper RIP configuration spend hours troubleshooting color shifts and white fringe instead of filling orders.
The inventory layer is equally non-negotiable. Garment businesses deal with size and color variants at a scale that generic retail software cannot handle. A shirt in five sizes and four colors creates 20 SKUs from one product. Your garment printing management system must track each variant in real time, support barcode scanning, and generate VAT-compliant invoices without manual data entry.

What are the essential RIP software features for garment printing?
RIP software like AcroRIP, Maintop, and PhotoPrint each handle the translation of your design file into precise printer instructions. Before installing any of them, confirm your hardware meets the baseline: a Windows PC (Windows 10 or later is standard), a USB security dongle for license activation, and the correct printer driver for your specific model.
Follow this installation sequence to avoid the most common setup errors:
- Download the correct version of your RIP software for your printer model. AcroRIP, for example, releases model-specific builds. Installing a mismatched version causes driver conflicts that are difficult to diagnose.
- Install the printer driver first, before launching the RIP software installer. The RIP needs to detect the driver during setup or it will default to a generic port configuration.
- Plug in the USB security dongle before opening the software for the first time. Most RIP licenses are hardware-locked. Launching without the dongle triggers a license error that can corrupt the initial configuration file.
- Run the software as administrator on first launch. This grants the RIP write access to system directories it needs for ICC profile storage and print queue management.
- Select your printer model and connection type in the setup wizard. USB connection is more stable than network connection during initial setup, reducing recognition errors and print failures.
- Run a nozzle check print before configuring any color settings. A clean nozzle check confirms the hardware communication is working before you invest time in profile calibration.
Pro Tip: Save a clean backup of your RIP installation folder immediately after setup and before any configuration changes. If a profile or preset gets corrupted later, you can restore to a known-good state in minutes rather than reinstalling from scratch.
How to configure RIP settings for color, white ink, and print quality
Correct configuration is where most print shops either win or lose on output quality. The settings below apply across AcroRIP, Maintop, and PhotoPrint, though menu names vary slightly between platforms.
ICC color profile setup:
- Load the ICC profile specific to your printer model, ink brand, and substrate (PET film for DTF, cotton for DTG). Generic profiles produce color shifts that no amount of artwork adjustment will fix.
- Calibrate your monitor with a hardware colorimeter before building profiles. Screen-to-print color matching depends on an accurate display reference.
- Ink limiting and ICC calibration with a spectrophotometer prevents color shift, white fringe, and opacity problems. This step separates shops producing professional results from those constantly troubleshooting.
White ink channel configuration:
- Select DTF mode in your RIP software and set the media to PET film with CMYK+White ink channel enabled. Skipping this step is the leading cause of white fringe and weak opacity in DTF output.
- Set white ink opacity between 85% and 95% for most dark garment applications. Going above 95% increases ink consumption without a visible quality gain.
- Configure white choke (also called white shrink) to pull the white underprint 1 to 2 pixels inside the color boundary. This prevents white ink from bleeding past the color layer edge.
Resolution and screening:
- Use 720 x 1440 dpi for production runs on most DTF printers. Higher resolutions increase print time without meaningful quality improvement on standard PET film.
- Set ink drop size to medium for general production. Switch to small drops only for fine-detail artwork like small text or thin lines.
Pro Tip: After dialing in your settings for a specific substrate and ink combination, save the entire configuration as a named preset. Saved RIP presets reduce future job setup from minutes to seconds, which compounds into significant time savings across a full production week.
What inventory and order management features does a garment shop need?
Garment billing software must support size and color variants, barcode billing, VAT invoicing, and real-time stock tracking to deliver retailer-level accuracy. Systems like CloudMe (used widely in UAE garment retail) and Odoo each approach this differently, and the right choice depends on your order volume and integration needs.
The table below compares the core capabilities you should evaluate when selecting a garment printing management system:
| Capability | Why it matters for garment print shops |
|---|---|
| Size and color variant tracking | One product can generate 20+ SKUs. The system must handle each variant as a distinct inventory unit. |
| Real-time stock alerts | Prevents stockouts on high-velocity SKUs and flags overstock before it ties up cash. |
| Barcode scanning and billing | Speeds up order intake and reduces manual entry errors at checkout or during fulfillment. |
| VAT-compliant invoicing | Required for tax compliance in most markets. Manual invoice generation at scale is error-prone. |
| Multi-branch or multi-location support | Garment print shops serving wholesale and retail channels need consolidated stock visibility across locations. |
When configuring Odoo or a similar platform, enable Storage Locations and Batch/Serial tracking before entering any live stock. These options cannot be added once stock moves exist in the system. Skipping this step during setup creates tracking gaps that require a full inventory reset to fix.
Pro Tip: Set up your size and color variant matrix before importing any product data. Rebuilding variant structures after stock is live is one of the most time-consuming corrections in garment inventory management.
How to integrate RIP software with your inventory and order management system
Integration is where your garment print shop software setup shifts from a collection of tools into a connected production system. The key distinction to understand first: Print MIS focuses on production workflows, while ERP integrates finance, purchasing, and inventory into a shared data environment. Knowing which type of system you are connecting determines your integration approach.
The practical benefits of connecting your RIP output to your inventory system include:
- Automatic inventory deduction when a print job completes. Instead of manually updating stock after each run, the system pulls quantity from the correct SKU the moment the job closes in the production queue.
- Triggered reorder alerts when a variant drops below a set threshold. This is especially useful for blank garment stock that feeds your DTG or DTF operation.
- Order status visibility across production and fulfillment. When a customer order moves from the print queue to shipping, the inventory record and order status update together without manual intervention.
- Consolidated reporting across production volume, ink consumption, and inventory turnover. Integrated systems enable real-time job costing and inventory updating, which gives you accurate margin data per SKU rather than estimates.
Set up your variant structure and storage locations in the inventory system before connecting it to your production queue. Data consistency at the point of integration depends on the inventory layer being fully configured first. Connecting a half-built inventory system to a live production queue creates mismatches that are difficult to trace back to their source.
For print-on-demand operations managing multiple sales channels, Pythiastechnologies offers production queue management that connects print job status directly to inventory and order fulfillment workflows.
What common mistakes should you avoid during print shop software setup?
Most setup failures are predictable and preventable. The issues below appear repeatedly across DTF and DTG operations, and each one is faster to avoid than to fix after the fact.
- Misconfigured white ink channel. Most repeat-production print failures trace back to incorrect white ink channel configuration rather than artwork design. Confirm DTF mode is active, PET film is selected, and CMYK+White channel is enabled before your first production run.
- Wrong ICC profile loaded. Using a generic or mismatched profile causes color shifts that look like ink problems. Always load the profile built for your specific printer, ink brand, and substrate combination.
- Skipping Storage Locations in inventory setup. Batch and serial tracking options cannot be added to existing stock moves. Enable them during initial configuration, not after you have processed your first orders.
- Using a wireless connection for RIP communication. Network instability during a print job causes mid-job failures and corrupted output. Use USB for all RIP-to-printer communication, particularly during setup and calibration.
- Not saving configuration presets. Every time you reconfigure settings manually, you introduce the risk of inconsistency. Save a named preset after each validated configuration so repeat jobs load correctly every time.
“Correct RIP setup including ink limiting, white choke, and ICC profile calibration prevents the most common print quality issues. Following step-by-step calibration with a spectrophotometer and monitor calibration leads to professional, repeatable results.” — Sublistar DTF RIP Setup Guide
Key takeaways
A correctly configured garment print shop software setup requires precise RIP calibration, variant-ready inventory management, and connected production workflows before the first job runs.
| Point | Details |
|---|---|
| RIP software is non-negotiable | Without correct RIP configuration, professional DTF and DTG print quality is not achievable. |
| White ink setup drives output quality | Configure DTF mode, CMYK+White channel, and white choke before any production run. |
| Inventory variants must be set up first | Build your size and color variant matrix before importing stock or connecting to production systems. |
| Save presets for every validated config | Named presets reduce repeat job setup time and eliminate manual reconfiguration errors. |
| Integration requires a fully built inventory layer | Connect your RIP and order management systems only after inventory structure is complete. |
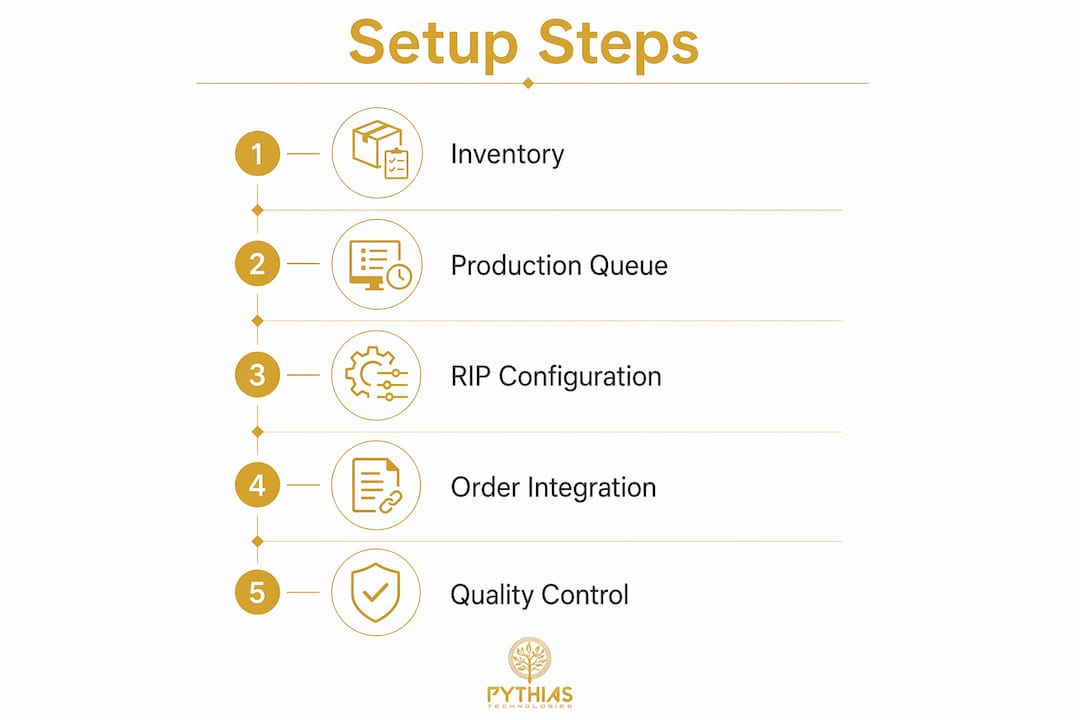
Why I think most print shops set up software in the wrong order
I have seen the same pattern repeatedly: a shop invests in good hardware, installs RIP software, and starts printing before the inventory system is configured. Orders come in, stock gets consumed, and nobody has accurate numbers. By the time the inventory system goes live, the data is already wrong and the team spends weeks reconciling.
The correct sequence is inventory first, then production queue, then RIP calibration. Your inventory variant structure defines how every downstream system tracks output. If that foundation is incomplete, every integration you build on top of it inherits the same gaps.
The other mistake I see is treating RIP calibration as a one-time task. Inks change between batches. Substrates vary by supplier. A profile that produced perfect results six months ago may be drifting today. Scheduling quarterly ICC recalibration and nozzle checks is not optional maintenance. It is the difference between a shop that scales and one that plateaus because quality becomes unpredictable.
The shops that scale efficiently are the ones that invested time upfront in building saved presets, configuring variant tracking correctly, and connecting their production queue to their inventory system before volume increased. That upfront investment pays back every single day in reduced errors, faster job setup, and accurate reporting. You can review the garment printer software checklist from Pythiastechnologies to work through this sequence systematically.
— Michael
Take your garment print shop operations further with Pythiastechnologies
Pythiastechnologies is a print-on-demand production automation platform built specifically for garment printers and print-on-demand businesses. The platform covers inventory management with full size and color variant support, production queue control with real-time job tracking, and multi-marketplace integration so your orders, stock, and fulfillment data stay connected across every sales channel. If you are setting up or scaling a garment print operation and want software that handles the complexity of DTF, DTG, and embroidery workflows without manual workarounds, explore what Pythiastechnologies offers. Book a demo to see the full platform in action.
FAQ
What is RIP software and why does garment printing need it?
RIP (Raster Image Processor) software controls white ink layers, ink density, color profiles, and print speed in DTF and DTG workflows. Without it, professional print quality is not achievable on garment printing hardware.
How do I set up white ink in RIP software for DTF printing?
Select DTF mode in your RIP software, set the media to PET film, and enable the CMYK+White ink channel. Configure white choke to pull the underprint 1 to 2 pixels inside the color boundary to prevent white fringe.
What inventory features does a garment print shop need?
Garment print shop inventory software must support size and color variants, real-time stock tracking, barcode scanning, and VAT-compliant invoicing. Systems like Odoo and CloudMe are built to handle these requirements at scale.
Can I connect my RIP software to my inventory management system?
Yes. Print MIS and ERP systems can be integrated so that completed print jobs automatically update inventory counts and trigger reorder alerts. Set up your full inventory variant structure before making this connection.
What is the most common mistake in garment print shop software setup?
The most common mistake is skipping Storage Locations and batch tracking during inventory setup. These options cannot be added once live stock exists, making early configuration critical for accurate garment variant tracking.
Recommended
- Garment Printer Software Checklist for Print Pros | Pythias Technologies | Pythias Technologies
- Optimize Your Garment Printing Shipping Workflow | Pythias Technologies | Pythias Technologies
- DTG Printing Order Management for Print Shops in 2026 | Pythias Technologies | Pythias Technologies
- Pythias Technologies — Print-on-Demand Automation Platform